
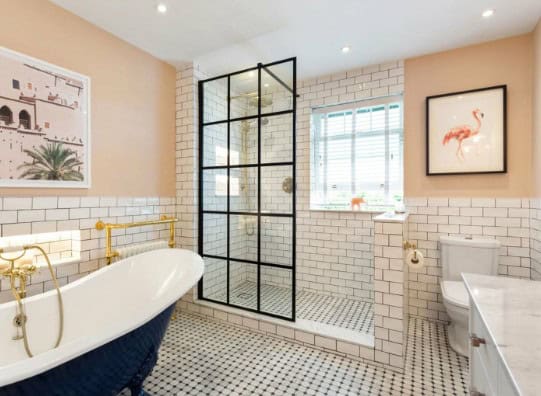
Wouldn’t having a durable, long-lasting, functional, and aesthetically appealing bathroom be nice? This is achievable but also dependent on proper decision-making and construction. So, can you tile over drywall in a shower?
You can tile over drywall in a shower, but you shouldn’t. Drywall is not a suitable substrate for wet areas because it is not moisture-resistant. Moisture will eventually seep through the tiles and grout gaps, making the drywall soggy, thus causing mold and pest invasion.
So, what is the alternative, you ask? Find out below. Also, discover the downsides of tiling over drywall in showers in detail in the subsequent sections.
Can You Tile Over Drywall In A Shower? (A Detailed Look)
Tiling over drywall in showers and other wet areas is not recommended, but it does happen. After all, it is a cheaper option up front than using materials specifically designed for wet areas like cement backer board, making it an attractive option for people on a tight budget.
The lack of awareness about proper installation methods can also cause people to install tile over drywall in wet areas.
The Downsides of Tiling Your Shower Over Drywall
So, despite being cheap, why is tiling over drywall in a shower not recommended? Here are the reasons.
1) Moisture Absorption
Drywall easily absorbs water because it is not moisture-resistant, so tiling over drywall in your shower can make it saturated. The moisture will eventually weaken the drywall and make it warp.
2) Lack of Stability
Drywall is relatively soft and flexible compared to the substrates commonly used in wet areas, such as cement backer boards. It’s more susceptible to contraction and expansion stemming from temperature and humidity changes, which is common in showers.
The continuous movement of drywall can lead to cracks in the grout lines and damage to the tiles. In addition, drywall may not provide the same level of support as more rigid materials, leading to sagging or failure over time.
3) Mold and Mildew Growth
As mentioned above, drywall readily absorbs moisture. This creates a perfect mold and mildew breeding ground. Also, organic materials, such as paper in drywall, provide a food source for mold, helping the mold spores to thrive and grow.
4) Durability Issues
The inherent characteristics of drywall in high-moisture environments make it less durable in showers. For instance, as the water gets absorbed into the drywall, this material weakens and deteriorates, compromising the wall’s structural integrity and leading to sagging or deformation.
Moreover, the moisture content in the drywall can interfere with the bonding between the tiles and the substrate, leading to tile detachment or failure. Additionally, a mold or mildew-infested shower is aesthetically unappealing and compromises your health as well.
The bottom line is that tiling over drywall in a shower is cheaper upfront but overall more costly. You will do more repairs and replacements, racking up the expenses.
Can You Waterproof Drywall For Shower?
You cannot waterproof regular drywall for showers and other high-moisture areas. While you can protect it with a waterproofing membrane like waterproofing paint, sealers, or membranes, these solutions do not make tiling over drywall in your shower a good idea.
You probably wonder whether the water-resistant drywall (green board) is suitable. No, it is not. Furthermore, do not tile over plain plywood either because it soaks up moisture.
What Material Goes Behind Tile In A Shower?
Now that you know the materials you should not use as backing materials when tiling your shower, what material should go behind the tiles?
The cement backer board (CBU) is the most popular and widely used material for tiling showers. It has become a standard choice in the construction and remodeling industry for wet areas such as bathrooms and showers.
It is highly recommended for tiling showers because it’s readily available and easy to install. Despite being a dense and sturdy material, it is relatively easy to cut and install as it comes in sheets that you can score and snap or cut with a saw.
The cement backer board is also fire and moisture-resistant. Moreover, it is sturdy and durable, thus capable of withstanding the weight and pressure of tiles.
Furthermore, its rough surface provides good adhesion for thin-set mortar, promoting a strong bond between the board and the tiles. CBU is also compatible with various types of tiles, including ceramic, porcelain, and natural stone.
Well-known CBU brands include HardieBacker and WonderBoard.
How To Prepare Shower Drywall For Tiling
The work you do before installing your shower tiles determines how well the project turns out. You must invest your time and carry out proper preparation if you aim to do a good job.
You risk ruining your drywall, incurring costly repairs, and achieving poor results if you cut corners. To avoid these, here’s how to prepare your shower drywall for tiling.
1. Assess the Existing Drywall
Before anything else, assess the existing drywall to ensure it’s in good condition and suitable for tiling.
Inspect it for mold, water damage, or mildew. Soft spots, discoloration, or a musty odor indicate water infiltration and that you may need to replace the drywall.
Also, probe for stability by gently tapping the drywall with a screwdriver or a small tool. If you hear hollow sounds or find areas where the drywall is soft, it could indicate deterioration.
Cut out and remove the damaged parts, then replace them with new moisture-resistant drywall, making sure to secure it to the wall studs properly.
2. Remove Existing Finishes
If your drywall is painted, remove the material with a wallpaper scraper or putty knife. Scrape off as much paint as possible to expose the bare drywall to ensure a proper bond between the new tile and the substrate.
Patch any holes or imperfections on the drywall with a suitable joint compound. After that, sand the patched areas smooth once the compound is dry.
Additionally, vacuum or wipe down the entire surface to remove dust and debris. This step is important because a clean, dust-free surface ensures a strong bond between the drywall and the new tile.
Also, apply a coat of primer to the prepared drywall surface and let it dry completely.
3. Check for Studs
Take time to find the studs in your drywall because you will need to secure the substrate to the studs for a stable and secure foundation for the tile installation. Follow these steps to find studs:
- Purchase or borrow a stud finder from a hardware store.
- Activate the stud finder. Most stud finders have a button or switch.
- If necessary, calibrate the stud finder. Hold the device against the wall in an area without a stud and press a calibration button.
- Firmly position the stud finder against the drywall, then glide it horizontally. Start at a point where you suspect a stud might be based on the typical spacing in your area (usually 16 or 24 inches apart).
- Pay attention to indicator lights, sounds, or a digital display as you move the stud finder. These signals change when a stud is detected.
- When you find a stud, mark its location with a painter’s tape or pencil.
- Continue the process to find more studs.
4. Seal Joints and Corners
For this job, you will need a moisture-resistant joint compound, fiberglass mesh tape, a putty knife or drywall knife, and a sanding block. Mix the joint compound per the directions provided by the manufacturer.
Apply a thin joint compound layer over the joints between the drywall sheets with a putty knife or drywall knife. Ensure the compound covers the seams evenly.
After applying the joint compound, press fiberglass mesh tape into the wet compound along the seams and corners. The tape reinforces the joint compound and prevents cracking.
After that, smooth the joint compound with a putty knife or drywall knife to remove excess compound and ensure a flat finish. Feather the compound’s edges away from the joint’s center for a seamless transition.
Let the joint compound dry thoroughly, then smooth the sealed joints using a sanding block or sandpaper. Sand lightly to avoid removing excess material.
Next, wipe down the sanded area with a damp, clean sponge or damp cloth to remove dust or debris. If you find any imperfections in the sealed joints and corners, apply a second coat of the joint compound.
Lastly, apply a coat of primer over the sealed joints and corners to create a uniform surface.
5. Install Cement Backer Board
Cut the cement backer board to fit the area you intend to install it, then attach the backer boards to the studs using backer board screws. Space the screws approximately every 8 inches along the studs.
Use a straightedge to ensure the backer board is level and plumb. Cut openings for fixtures with a utility knife or a hole saw.
Make sure you also seal the seams and corners of the backer board with fiberglass mesh tape.
Can You Tile Over Drywall In A Shower Ceiling?
Like shower walls, you should not tile over drywall in a shower ceiling because this is a high moisture, high humidity area. Follow best practices for waterproofing and use appropriate materials when tiling your shower ceilings for a durable and long-lasting installation.
How Thick Should Cement Board Be For Shower Walls?
The most common cement board thicknesses for shower walls are 1/2 inch and 1/4 inch. However, the appropriate thickness depends on the product you choose and the substrate you are working with.
1/2-inch cement board thickness is suitable for most applications and is commonly used for wall installations in showers. It provides a sturdy surface for tile and is appropriate for wall and ceiling installations.
In contrast, use 1/4 Inch cement board thickness if the existing wall surface is in good condition and you want to minimize the thickness of the finished wall. It is lighter than a 1/2-inch board, making it suitable for some installations.
Summary of Can You Tile Over Drywall In A Shower?
Ultimately, the success of a tile installation in a shower depends on adherence to best practices, proper preparation, and ongoing maintenance. Tiling over drywall is not a good practice, so it is best to avoid it for a watertight, durable, pleasant shower space. Instead, choose the more preferred choice- tiling over cement backer board.
Also, Read: