
For professional tilers and seasoned DIY enthusiasts, tiling a bathroom wall may not be all that difficult. However, not everyone can say so; therefore, how hard is it to tile a bathroom wall?
The level of difficulty in tiling a bathroom wall varies depending on your experience level with DIY and job complexity. Some types of tiles are more challenging to install than others. Moreover, it will take you longer to tile a smaller bathroom compared to a bigger one.
If you decide to tile your bathroom wall yourself, ensure you have the necessary skills, gather the needed tools and materials, and be prepared for any challenges. This post discusses these challenges and their fixes and offers a step-by-step guide for tiling a bathroom wall.
How Hard Is It To Tile A Bathroom Wall? (Challenges & Fixes)
A DIY bathroom wall tiling project comes with its share of challenges that you must solve to ensure the project proceeds well. Check the potential challenges and fixes below.
1. Uneven Wall Surface
Walls, especially in older homes or DIY installations, may not be perfectly flat and even, making tile installation difficult. Unfortunately, uneven wall surfaces are common challenges when tiling a bathroom wall.
Fix
Use a level or straightedge to identify high and low spots on the wall, then note the size and location of these imperfections.
If you have small high spots, sand them down using coarse sandpaper or a sanding block until the wall is level, then clean the wall to remove dust and debris afterward. On the other hand, you can deal with low spots or depressions in the wall by applying thin-set mortar or back-buttering tiles.
2. Moisture and Waterproofing
Since bathrooms are high-moisture areas, a waterproof barrier behind the tiles is crucial to prevent water damage. Before tiling, ensure there are no existing moisture issues, leaks, or damaged wallboards that could compromise the waterproofing.
Fix
Apply a waterproofing membrane to the wall surface. The available options include liquid waterproofing membranes and sheet membranes.
Sometimes, installing a cement backer board before waterproofing is necessary.A cement backer board provides a solid, moisture-resistant substrate for tile.
Seal around plumbing fixtures, such as faucets and showerheads, with silicone or waterproof sealant to prevent moisture from seeping behind the wall. Also, use waterproofing tape or membrane to reinforce corners and edges.
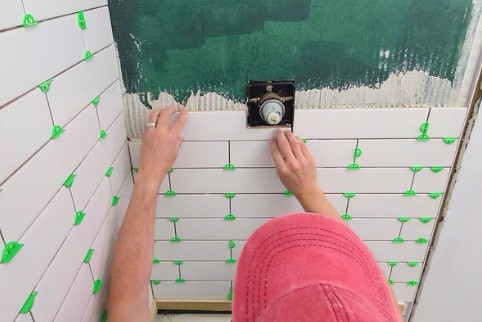
3. Tile Alignment
To achieve a visually appealing and professional-looking bathroom wall, you must align the tiles properly. However, doing so around corners and edges can be challenging.
Fix
Use tile spacers between tiles for consistent gaps, proper alignment, and uniform grout lines. Choose the appropriate size of spacers based on your tile size and project.
An excellent example is the Tile Leveling System with Tile Plier- 300-piece Tile Spacers Clips and 100-piece Reusable Wedges (View on Amazon). It’s great for walls or floors.
Dry-fit tiles before applying adhesive to ensure they align properly. Invest in a quality tile level system to achieve a level surface.
4. Cutting Tiles
Cutting tiles is common, especially to fit tiles around corners, fixtures, and edges.
Fix
Here are the tools you’ll need.
- Tile Cutter: It’s a handy tool for straight cuts. Manual tile cutters are suitable for ceramic and porcelain tiles, while electric ones are better for tougher materials like stone or thick porcelain.
- Tile Nippers: It is useful for small, irregular cuts and shaping around fixtures, allowing you to trim and shape tiles as needed.
- Tile Saw: A wet tile saw provides precision cuts and intricate designs. It creates clean, accurate cuts using a diamond-coated blade and water.
- Angle Grinder: Cut tiles, especially hard or thick tiles, using an angle grinder with a diamond blade. It’s suitable for straight cuts and curves.
5. Adhesive Application
Applying adhesive unevenly can result in tiles not adhering properly or being misaligned.
Fix
Use a notched trowel to apply the adhesive evenly. In addition, select and mix the adhesive per the manufacturer’s instructions.
Work in tiny sections to make sure the adhesive does not dry out before tile installation. Also, spread the adhesive evenly and press the tiles using a rubber float.
6. Grout Application
Grout ensures the tiles are secure while keeping a clean and attractive appearance. When applying grout, the challenge is filling the grout lines evenly and ensuring excess grout doesn’t mar the tile surface.
Fix
Use a rubber grout float to press the grout into the gaps with a rubber grout float (hold it at a slight angle to the tiles). Moreover, wipe away excess grout with a damp sponge before it dries and seal the grout after it cures to prevent staining.
7. Tile Layout and Design
Planning the tile layout and design can be daunting, especially if you have intricate patterns or mosaics in mind.
Fix
Plan your layout, and use tile spacers and guidelines to ensure a balanced design. Additionally, consider creating a tile layout on a separate surface or using tile design software for complex patterns.
Before applying adhesive, do a dry layout by placing tiles on the wall without adhesive. This helps visualize how they will fit and allows you to make necessary adjustments or cuts before committing to adhesive.
8. Grout Haze
Grout haze is the thin film of grout that stays on the tile surface after grouting. While you can effectively resolve it with the right cleaning tools, it remains a common issue after completing a tile installation.
Fix
Buff the tile surface with a clean, dry cloth or use a grout haze remover. Apply the grout haze remover to a small section of the tiles, typically 10-15 square feet, or as recommended by the product instructions.
After that, let the remover sit on the grout haze for the recommended dwell time, typically from a few minutes to 15 minutes.
Also, a grout sealer protects the grout from future staining or haze formation, so consider applying it.

How To Tile A Bathroom Wall
Below is a step-by-step guide for tiling a bathroom wall.
Tools and Materials
To get started with tiling a bathroom wall, some of the essential items you’ll need include:
- Tiles
- Adhesive
- Trowel
- Tile spacers
- Tile cutter or wet saw
- Level and measuring tools
- Grout
- Grout float
- Sponge and bucket
- Tile spacers
- Sealer
Planning and Preparation
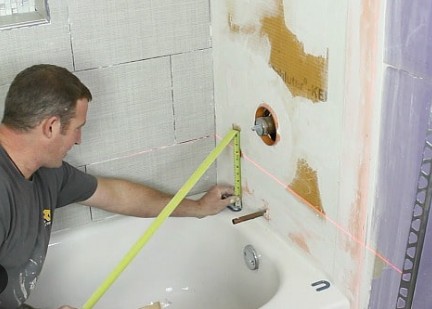
i) Measure your bathroom
Calculate the square footage of the wall you intend to tile to determine how many tiles you’ll need. Purchase some extra tiles for any mistakes or future repairs.
ii) Select your tile layout
Decide on the tile pattern you want to create on your bathroom wall. Common layouts include subway, herringbone, and grid patterns. Sketch your design to visualize the final result.
iii) Prepare the wall
Have a dry, clean wall without loose paint, wallpaper, or debris before tiling.Additionally, patch any imperfections, such as cracks or holes, with appropriate filler and sand the surface smooth.
iv) Apply a waterproofing membrane
Apply a waterproofing membrane to protect your bathroom wall from moisture damage.
Steps
1. Begin in the Center
Tile from the center of your bathroom wall then work outward. This ensures the tiles at the corners and edges of the wall are of equal size and visually balanced.
Measure and mark the centerline of the wall both horizontally and vertically.
2. Apply the Adhesive
Using your notched trowel, spread a layer of tile adhesive or thin-set mortar on a small section of the wall, following the centerline marks. Make sure to spread the adhesive evenly, creating ridges with the notched side of the trowel.
The size of the section you work on will depend on your comfort level and the adhesive’s drying time, but it’s typically around a 3×3-foot area.
3. Place the Tiles
Press the first tile into the adhesive, aligning it with the centerline marks then put tile spacers between the tiles for consistent spacing.
Continue placing tiles in a row, using a level for straight, level tiles. Adjust the tiles as needed to maintain even spacing and alignment.
4. Cut Tiles for Edges and Corners
You’ll likely have to cut the tiles when you reach the edges and corners of the wall to ensure they fit. Measure and mark the tiles that need trimming then create precise cuts with a wet saw or tile cutter.
Take time to ensure accurate measurements and cuts because these areas are often more visible.
5. Continue Tiling
Repeat the adhesive application, tile placement, and cutting process as you work your way across the wall. Be sure to wipe away any excess adhesive that may squeeze out from between the tiles while it’s still wet.
Continue until you’ve covered the entire wall with tiles.
6. Allow the Adhesive to Set
Let the adhesive dry after placing all the tiles.This typically takes 24 hours but may vary based on the environmental conditions and adhesive type.
7. Apply Grout
After the adhesive has dried, apply the grout. Mix the grout then spread it evenly over the tiles with a grout float, ensuring you press it into the gaps.
Work in small sections and fill all the spaces between the tiles.
8. Remove Excess Grout
After spreading the grout, wipe any excess grout using a damp sponge. Rinse the sponge frequently and continue wiping until the tiles are clean and the grout lines are smooth and even.
Avoid excessive scrubbing, as this can remove too much grout from the joints.
9. Allow Grout to Cure
Let the grout cure for the recommended time specified on the product packaging, typically around 72 hours. Do not touch or disturb the tiles until the time elapse for a proper bond.
10. Apply Grout Sealer
Keep the grout from stains and moisture by applying grout sealer. The grout used dictates this step’s necessity.
11. Final Touches
Once the grout sealer has dried, remove any remaining haze or residue from the tiles with a clean, dry cloth. Install any trim pieces or accessories, such as tile edging or corner pieces, to complete the look of your bathroom wall.
Summary of How Hard Is It To Tile A Bathroom Wall?
Although it has challenges, tiling a bathroom wall is achievable, provided you navigate the process properly, gather the required tools, and deal with challenges effectively. Proper preparation, correct application, and patience are key when tiling a bathroom wall.
Also, Read: