So, your showerhead is loose. While you can continue showering with a loose shower head, it would be best to fix it promptly. Besides causing issues like water damage, inefficient water flow, wear and tear, mold and mildew growth, you also risk being hit by a falling showerhead.
Your showerhead can come loose due to normal wear and tear, mineral buildup, incorrect installation, persistent leaks, worn-out parts, inadequate threading tapes, or vibrations. Fortunately, you can fix your showerhead yourself through a few fixes.
Let’s get right into the causes and how to fix a loose showerhead.

Causes and Fixes of A Loose Shower Head
| Problem | Possible Causes | Recommended Fixes | |
| 1. | Normal Wear and Tear | Prolonged shower use | Tighten your showerhead or replace it |
| 2. | Mineral Buildup | Hardwater use | Soak your showerhead in vinegar and water, then scrub it clean |
| 3. | Incorrect Installation | Installing your showerhead incorrectly or using the wrong tools and materials | Reinstall the showerhead |
| 4. | Persistent Leaks | Loose connections Damaged washer or O-ring Water pressure issues Clogged showerhead A faulty diverter valve Damaged pipe Worn-out showerhead | Tighten loose connections Replace worn-out washer or O-ring Unclog your showerhead Replace the diverter valve Fixed damaged pipes Get a new showerhead |
| 5. | Vibrations | High water flow rate and pressure Movement of pipes behind the walls | Absorb vibrations with a rubber washer Invest in a showerhead with a swivel joint Install anti-vibrations pads |
| 6. | Worn-out Parts | Wear and tear in parts like the washers, gaskets, or O-rings | Replace worn-out parts |
| 7. | Inadequate threading tapes | Applying the threading tape correctly Using poor-quality threading tape | Buy high-quality threading tape and apply it to your showerhead |
1. Normal Wear and Tear
Over time, frequent usage, exposure to water, and the constant expansion and contraction of materials due to temperature changes can cause the fittings to become loose.
Even with proper installation and maintenance, the repeated use of the shower and the movement/vibrations associated with it can gradually loosen the connection between the shower arm and the showerhead. This is a natural occurrence in any plumbing fixture and happens to various bathroom components over time.
Regular maintenance and timely checks can help prevent loose fittings due to normal wear and tear.
Fix
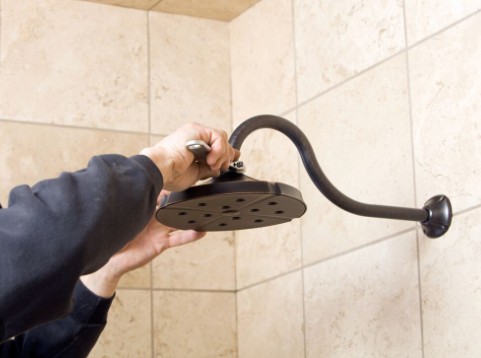
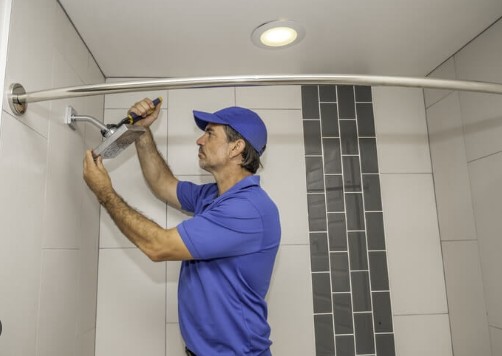
Hand-tighten your showerhead, and then use the adjustable wrench or pliers to give it a gentle quarter-turn to ensure a snug fit.
Check the connection at the wall as well if you find that the shower arm itself is becoming loose from the wall. If it’s a wall-mounted showerhead, ensure the arm is securely fastened to the wall’s plumbing or water supply.
If your showerhead is beyond repair, buy and install a new one. AquaCare High Pressure 8-mode Handheld Showerhead (View on Amazon) is an excellent choice. It has anti-clog nozzles, a built-in power wash to clean tubs, tiles, and pets, and comes in different colors.
2. Mineral Buildup
Hard water contains high levels of minerals, such as calcium and magnesium, that can accumulate over time on various surfaces, including showerheads causing them to become loose.
Fix
a) Remove the Showerhead
Use an adjustable wrench or pliers to carefully unscrew the showerhead from the shower arm, turning it counterclockwise. However, before using the wrench or pliers, protect your showerhead’s finish by wrapping a cloth around it.
b) Soak The Showerhead
Fill a bowl or a plastic bag with water and white vinegar in a 1:1 ratio. If you can remove the faceplate or any removable parts from the showerhead, do so and soak them in the vinegar solution.
Otherwise, tie the bag around the showerhead, ensuring the vinegar mixture covers the mineral-affected parts. Leave it to soak for at least a couple of hours or longer if the buildup is significant.
c) Scrub The Showerhead
After soaking, gently scrub the showerhead’s faceplate and nozzles with a brush or toothbrush to dislodge the loosened mineral deposits.
d) Rinse the Showerhead
Thoroughly rinse the showerhead using clean water to wash away the remaining vinegar and loosened minerals.
e) Inspect and Reattach
Check the showerhead’s threading and the shower arm for any remaining mineral buildup or debris. Clean them if necessary.
Once clean and dry, apply Teflon tape to the shower arm’s threads and carefully screw the showerhead back onto the arm. Hand-tighten it initially, then give it a gentle quarter-turn using the adjustable wrench or pliers to ensure a snug fit.
f) Turn On The Water
Restore the water supply to your shower, then check for leaks. If there are no leaks and the showerhead feels secure, you have successfully fixed the issue caused by mineral buildup.
3. Incorrect Installation
For any of your fixtures, including showerheads, to work properly and stop breaking down constantly, you must install them correctly. Therefore, if you find your showerhead loose, check whether you followed the right installation steps.
You may have also not used the necessary tools and materials.
Fix
If you identify any installation issues, reinstall the showerhead properly. Start by taking out the showerhead with pliers or an adjustable wrench.
Ensure you gather the necessary components for proper installation. This typically includes a washer or O-ring to give the connection between your showerhead and shower arm a watertight seal.
Also, before reattaching the showerhead, wrap some Teflon tape around the shower arm’s threads to help create a tighter seal. Next, carefully screw the showerhead back onto the shower arm.
Lastly, before restoring water flow, tighten your showerhead properly by hand, then with an adjustable wrench.

4. Persistent Leaks
The areas surrounding your showerhead will become weak if your showerhead is persistently leaking, resulting in a loose showerhead. You will need to address the leak and tighten your showerhead to fix this problem.
The causes of a leaky showerhead include loose connections, damaged washer or O-ring, water pressure issues, and clogged showerhead. A faulty diverter valve, damaged pipe, and worn-out showerhead also cause it.
Fix
- Replace the washer or O-ring. Ensure you buy the correct size.
- Regulate the water pressure and potentially resolve the leak issue using a pressure-reducing valve installed in the water line.
- Regularly clean your showerhead using vinegar soak to prevent blockage.
- Replace the diverter valve.
- Fix damaged pipes.
- Replace the showerhead.
5. Vibrations
Vibrations from nearby equipment or even just the regular use of the bathroom can cause the connections to loosen over time and, in turn, loosen the showerhead. These vibrations occur due to several factors, such as the water pressure, the flow rate, or even the movement of pipes behind the walls.
Fix
i) Absorb Pressure With A Rubber Washer
Place a rubber washer between the showerhead and the shower arm to help absorb some of the vibrations. The rubber washer acts as a cushion, reducing the impact of vibrations and helping to keep the showerhead in place.
ii) Check The Shower Arm
Sometimes, the issue might not be with the showerhead but with the shower arm or the connection inside the wall. Therefore, make sure the shower arm is tightly screwed into the plumbing in the wall.
If the arm is loose, use Teflon tape on its threads and then tighten it securely into the wall.
iii) Install a Showerhead With A Swivel Joint
A swivel joint allows the showerhead to move and adjust more freely, which can help reduce strain on the connection point. So, if your showerhead lacks a swivel joint, consider replacing it with a model with one.
iv) Inspect The Plumbing
Inspect the plumbing system if the vibrations are severe and persistent. Check for loose pipes or other issues that might be causing excessive vibrations.
v) Install Anti-vibration Pads
You can also install anti-vibration pads or foam gaskets behind the showerhead against the wall. These pads help dampen vibrations and provide additional stability.
6. Worn-Out Parts
Apart from the showerhead, examine other components like the washers, gaskets, or O-rings for damage. The parts serve crucial purposes; for instance, the O-ring is a tiny rubber ring made to help prevent leaks.
On the other hand, the washer is a rubber or plastic disk that forms a seal between the shower arm and the showerhead.
Fix
Take out the damaged parts and install the appropriate replacement parts.
7. Inadequate Threading Tapes
Threading tape creates a better seal between the shower arm and the showerhead, preventing water leaks and ensuring a secure fit. So, if you do not apply the threading tape correctly or use poor-quality threading tape, it can result in a loose connection.
Fix
i) Take Out The Showerhead
Use an adjustable wrench or pliers to carefully detach the showerhead from the arm. Turn it counterclockwise until it comes off.
ii) Inspect The Threading Tape
Check the threading tape previously applied to the shower arm’s threads. If it appears damaged, frayed, or unevenly applied, remove it altogether.
iii) Clean The Threads
After removing the old tape, inspect the threads on the shower arm and the showerhead for any residue or debris. Clean them thoroughly with a cloth or an old toothbrush to ensure a clean surface.
iv) Apply New Threading Tape
Use high-quality Teflon tape and wrap it around the shower arm’s threads in a clockwise direction. Ensure that you apply enough layers of tape to create a secure seal but avoid using excessive tape that may interfere with the proper fitting of the shower head.
v) Reattach The Showerhead
Carefully screw the showerhead back onto the shower arm, ensuring the new threading tape is in place and creating a tight seal. After that, tighten your showerhead by hand and an adjustable wrench or pliers, then restore the water flow.

How To Tighten Shower Head Swivel
Follow these steps to tighten a showerhead swivel
- Stop the water flow to your shower.
- Locate the swivel joint. It is typically between the showerhead and the shower arm.
- Hold the showerhead securely with one hand.
- With your other hand, turn the swivel joint clockwise to tighten it.
- If the swivel joint is too tight to turn by hand or requires more torque, use an adjustable wrench to tighten it gently.
- Restore the water supply to your shower after tightening the swivel joint, then check for any leaks.
Closing Remarks on Loose Shower Head
Fixing a loose showerhead isn’t complicated. With a few tools like a wrench or an adjustable wrench and the correct steps, your showerhead will sit snugly against your shower wall. Also, address the root cause of the issue to prevent a re-occurrence.
Also, Read:
