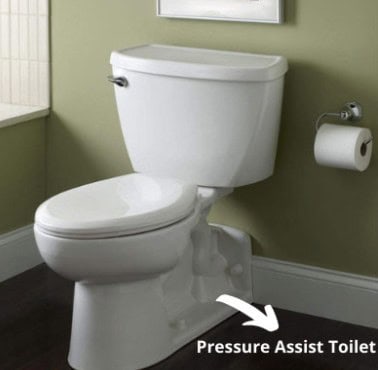
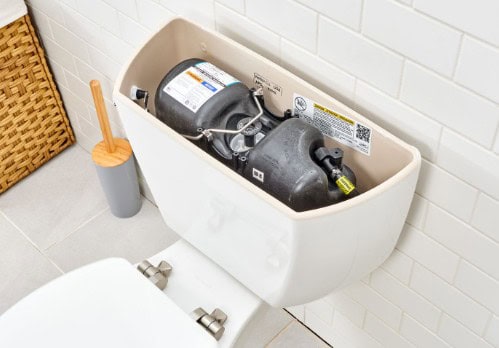
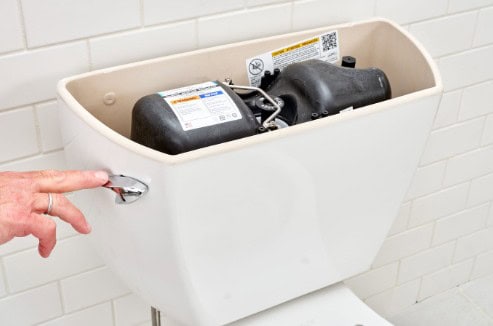
Pressure assist toilets may be highly efficient, low maintenance, clog less and have impeccable flushing. However, like any plumbing fixture, they can experience problems over time, so what pressure assist toilet problems can you encounter?
Pressure assist toilets can develop problems like a weak flush, water hammer, leaking, frequent running, noisy flush, and even clogs.
You must fix these problems for a trouble-free bathroom experience. So, let’s explore common pressure-assist toilet problems and provide practical fixes.

Pressure Assist Toilet Problems (Causes & Fixes)
| Problem | Possible Causes | Recommended Fixes | |
| 1. | Weak Flush | Low water pressure Clogged flush valve Blocked jet holes | Install a water pressure regulator Clean or replace the flush valve Clean the jet holes |
| 2. | Frequent Running | Damaged flush valve seal Incorrect water level adjustment | Replace the flush valve seal Adjust the water level |
| 3. | Water Hammer | High water pressure Loose pipes or mountings | Lower the water pressure Install a water hammer arrestor Tighten loose pipes or mountings |
| 4. | Leaking | Loose connections A damaged flush valve seal A faulty tank-to-bowl gasket. | Inspect and tighten the connections Replace a damaged, worn-out, deteriorated, or cracked flush valve seal Install a new gasket |
| 5. | Noisy Flush | Loose tank bolts Excessive air pressure | Tighten tank bolts Release air pressure Install anti-vibration pads |
| 6. | Clogging | Waste or foreign objects | Clear blockages with a plumber’s snake or a plunger |
1. Weak Flush
This is a common problem with pressure assist toilets, and it impairs these toilets’ efficiency and performance. It results from various issues, including low water pressure, a clogged flush valve, and blocked jet holes.
Pressure-assist toilets rely on adequate water pressure to create a forceful flush, so the toilet will deliver a weak flush if the water pressure is low. Debris, mineral deposits, sediment, or debris accumulation in the flush valve restrict water flow which then leads to a weak flush.
Also, if rim jet holes become blocked, it can result in a weak flush.
Fix
a) Check Water Pressure
Verify if low water pressure is the issue by checking other fixtures in your home. If they also have low pressure, it might be a problem with your home’s water supply, which you should contact your water utility provider to address.
In contrast, if the weak flush is isolated to your pressure-assist toilet, check the water supply valve leading to the toilet. Ensure it’s fully open.
Also, consider installing a water pressure regulator if the water pressure is too high or fluctuates significantly.
b) Inspect and Clean the Flush Valve
Before working on the toilet, close the shut-off valve, empty the toilet tank, and unscrew and remove the flush valve from the tank. After that, examine it for any visible blockages, sediment, or debris.
If you find any blockages, clean the flush valve thoroughly with a wire brush or a soft cloth to remove sediment or mineral buildup. You can also soak the flush valve in vinegar.
Get a replacement flush valve if it’s worn out, damaged, or cannot be cleaned effectively. Make sure to choose a flush valve compatible with your toilet model.
c) Clean the Jet Holes
As with the flush valve, empty the toilet tank and stop the water supply. After that, clean the jet holes around the toilet bowl’s rim using a stiff brush or an old toothbrush.
In addition, consider soaking the rim in vinegar to dissolve stubborn deposits.
d) Check for Other Obstructions
Inspect the trapway for any visible obstructions. If you notice an obstruction, remove it with a plumbing snake or auger.
2. Frequent Running
Frequent running typically indicates an issue with the toilet’s flushing mechanism or water control system. The common causes are a damaged flush valve seal and incorrect water level adjustment in the tank.
Fix
i) Check and Fix the Flush Valve Seal
Lift the tank lid and locate the flush valve at the bottom of the tank, then check the condition of the flush valve seal. If it’s damaged, cracked, or deteriorated, replace it.
To replace the flush valve seal, remove the old one and install a new, compatible seal following the manufacturer’s instructions. Furthermore, ensure it’s seated properly and creates a watertight seal.
ii) Adjust the Water Level
Most pressure-assist toilets have an adjustable float or water level control. Adhere to the manufacturer’s guidance to adjust the water level to the recommended setting.
Generally, keep the water level at approximately one inch below the overflow tube.
Once you’ve made the necessary water level adjustments, re-enable the water supply and allow the tank to refill. Flush the toilet and observe whether it stops running promptly after flushing.
Adjust the water level further if needed.
iii) Inspect for Other Leaks
The issue is not always limited to the flush valve seal. Therefore, check the entire flushing mechanism for any leaks or signs of water escaping where it shouldn’t. Address any leaks you find.
iv) Replace Worn or Damaged Parts
If you notice any worn or damaged components within the flushing mechanism, such as a faulty fill valve, replace them with compatible, high-quality replacement parts.
3. Water Hammer
Water hammer in a pressure-assist toilet occurs when there’s a sudden and loud noise, often sounding like a hammer hitting the pipes, as the toilet finishes flushing. This phenomenon is caused by the rapid stoppage of water flow within the plumbing system.
The common causes are high water pressure and loose pipes or mountings.
How does excessively high water pressure cause a water hammer, you ask? When a valve closes abruptly, such as the toilet’s flush valve, the high-pressure water has nowhere to go, causing a shockwave and the associated noise.
On the other hand, loose pipes, mounting brackets, or fixtures can vibrate when water flow is suddenly stopped, creating a water hammer. These vibrations can be transmitted across your plumbing system.
A water hammer can also occur if your plumbing system doesn’t have a water hammer arrestor.
Fix
a) Install Water Hammer Arrestors
Water hammer arrestors are small, air-filled chambers that dampen the impact caused by swiftly flowing water. Install them at key locations in your plumbing system to mitigate water hammer.
Locate the nearest water supply line to your pressure-assist toilet and install a water hammer arrestor in that line. Additionally, consider seeking the expertise of a plumber for correct installation.
b) Adjust Water Pressure
Determine the water pressure in your residence with a pressure gauge. After that, lower your home’s water pressure to acceptable levels (40-60 psi) by installing a pressure regulator if it currently exceeds 60 psi.
c) Secure Loose Pipes and Fixtures
Inspect your plumbing system for loose pipes, mounting brackets, or fixtures. Then, tighten or secure any loose components to prevent vibrations that are contributing to water hammer.
d) Adjust Flush Valve Settings
Some pressure-assist toilets have adjustable settings for the flush valve. So, adjust your toilet’s flush valve to close more gradually to help reduce the intensity of water hammer.

4. Leaking
Leaks can occur in various parts of a pressure assist toilet, including the pressure vessel, seals, or supply lines. Therefore, if you have a leaking pressure-assist toilet, promptly address the issue to curb water waste and potential damage.
The common causes of a leaking pressure-assist toilet are loose connections, a damaged flush valve seal, and a faulty tank-to-bowl gasket.
Loose or improperly sealed connections between various toilet components, such as the flush valve, fill valve, tank bolts, or tank-to-bowl gasket, can lead to leaks. Moreover, your pressure assist toilet can leak if the seal is damaged or deteriorated.
In addition, the gasket between the tank and bowl can be damaged or incorrectly positioned, causing water to leak from the base of the toilet.
Fix
i) Inspect and Tighten Connections
Examine all connections within the toilet tank, including the flush valve, fill valve, tank bolts, and tank-to-bowl gasket. Check for loose or improperly sealed connections.
Use a wrench or pliers to secure loose connections, making sure you achieve a tight seal. However, be careful not to overtighten and damage the components.
ii) Check the Flush Valve Seal
Check the condition of the flush valve seal located at the bottom of the tank. Replace it if it’s damaged, cracked, or deteriorated.
iii) Examine the Tank-to-Bowl Gasket
Examine the gasket between the tank and bowl for damage, wear, or misalignment. If it is damaged or positioned incorrectly, consider replacing it with a new one.
iv) Test for Leaks
After performing the necessary fixes, reopen the water supply then observe the toilet closely for any signs of leaks originating from the toilet base or tank.
If you notice any leaks, recheck and adjust the components you worked on or consult a professional plumber.
5. Noisy Flush
Pressure-assist toilets are noisier than gravity-fed toilets due to the sudden release of pressurized water. However, some noises can be disruptive and indicate underlying issues.
A noisy flush can occur due to loose tank bolts vibrating during flushing, creating noise or excessive air pressure within the tank.
Fix
i) Tighten Tank Bolts
Inspect the bolts that fasten the tank to the toilet bowl. If loose, use a wrench to tighten them securely, but be careful not to crack the porcelain.
ii) Release Air Pressure
Remove the tank lid and press down gently on the flush valve to allow the air to escape.
iii) Inspect for Other Loose Components
Check for any other loose components within the tank, such as the flush valve or fill valve. Tighten them as needed to prevent vibrations that can contribute to noise.
iv) Consider Anti-Vibration Pads
To further reduce vibrations and noise, consider installing anti-vibration pads under the toilet tank. These pads help dampen vibrations and may lead to a quieter flush.

6. Clogging
While pressure-assist toilets are designed to reduce the likelihood of clogs, they are not immune to them. Clogs can still occur, and they might be more challenging to clear due to the higher water pressure.
Fix
Clear the blockage with a plumber’s snake or plunger. However, avoid using chemical drain cleaners to protect the pressure vessel.
Summary of Pressure Assist Toilet Problems
By understanding the causes of these issues and following the recommended fixes and maintenance tips, you can keep your pressure-assist toilet functioning optimally and avoid costly repairs in the future. Furthermore, regular care and attention to your toilet can ensure a trouble-free bathroom experience for years to come.
Also, Read:
