
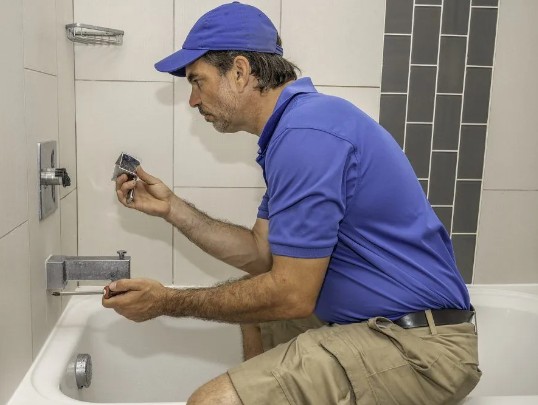
Taking out a shower handle with screws is a pretty straightforward process, but what if you are dealing with one without? In such a case, things can get a bit complicated, so it’s understandable to want to know how to remove shower handle without screws.
To successfully remove a shower handle without screws, you must know its type and the attachment mechanism keeping it together. You can remove some screwless shower handles by twisting and pulling them by hand. With other handles, you will require a handle puller.
This guide has the step-by-step instructions to safely and effectively remove a shower handle without screws.
How To Remove Shower Handle Without Screws (Key Points To Note)
Before taking out a shower handle without screws, there are some essential things to note. First, just because you cannot outrightly see the screws doesn’t automatically mean your shower handle doesn’t have screws.
Many modern shower handles do not have visible screws, which makes them sleek and minimalistic, thus enhancing a bathroom’s overall look. Without visible screws, the handle looks cleaner and more modern.
So, chances are the screws in your shower handle may be concealed. However, it is also possible that it really doesn’t have screws and that it has a different attachment mechanism.
Some screwless shower handles have snap-on handles that usually feature decorative caps or covers that snap into place to hide the fastening mechanism. Others have retaining clip handles, which are small metal components that secure the handle in position.
How To Remove A Screwless Shower Handle
The process of removing a screwless shower handle depends on the specific model and the attachment method. However, here’s a general guidance.
However, shut off your water supply beforehand, ideally using your bathroom’s water cut-off valve.
1. Identify the Type of Handle
Some handles have a cap or cover that conceals the attachment mechanism. Look for any decorative caps, buttons, or covers that could be hiding screws or fasteners. They might be located on the sides, base, or top of the handle.
The types of cover or caps include:
- Snap-On Covers: These can be gently pried off with a flathead screwdriver.
- Twist-Off Caps: Some covers might be threaded and twisted off counterclockwise.
- Integrated Covers: In some designs, the cover might be seamlessly integrated into the handle’s design, making it less noticeable.
2. Remove the Cover or Cap
If your shower handle has a cap or cover, gently pry off the cap or cover plate with a flathead screwdriver or a similar tool. Gently slide the screwdriver under the cap’s edge and carefully lift it off.
Note
Before removing the cover or cap, lay down a towel or cloth to catch any small parts or prevent them from falling down the drain.
3. Check for Set Screws
Use an Allen wrench or a screwdriver to check for set screws. Sometimes, the set screws are located underneath the cover or at the base of the handle.
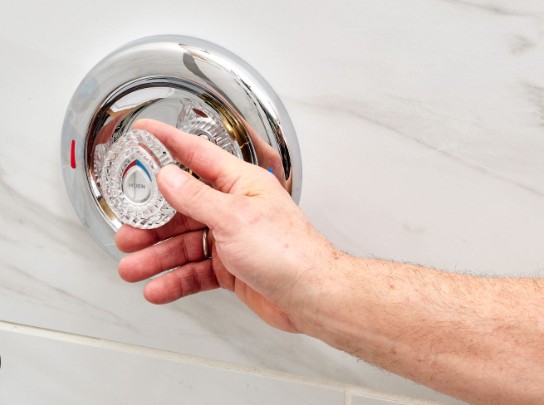
4. Pry or Twist to Remove
If there are no visible screws or set screws, the handle might be attached through pressure or clips. Try gently prying the handle away from the wall using a flathead screwdriver or a putty knife, but be careful not to damage the wall or handle.
Some handles might twist off counterclockwise. If there’s a cover plate or decorative cap, try twisting it gently to see if it comes off.
5. Use a Removal Tool
There are specific tools like a handle puller designed for removing shower handles without screws. These tools can help to grip the handle and twist it off without damaging the fixture. Consider getting one if you encounter difficulty.
If you’re having trouble or the handle seems complex, refer to the manufacturer’s manual or website for specific instructions on removing the handle safely.
6. Inspect and Clean
Check the valve stem and inside of the handle for any debris or damage then thoroughly clean the area prior to installing a new handle.
Caution
Taking your time is crucial to avoid damaging any components, so don’t rush through the process. If needed, use penetrating oil to loosen any stuck parts, but avoid getting it into areas that could affect the inner workings of the fixture.
How To Remove A Shower Handle With Set Screws
Tools and Materials
- Allen wrench (hex key)
- Screwdriver (if needed)
- Towel or cloth
- Penetrating oil (if the handle is stuck)
Steps
1. Locate the Set Screws
The set screws are typically located on the base or underside of the handle. Sometimes, they might be covered by a cap or plug that you’ll need to remove to access the screws.
2. Prepare the Area
Lay down a towel or cloth to catch any small parts or prevent them from falling down the drain.
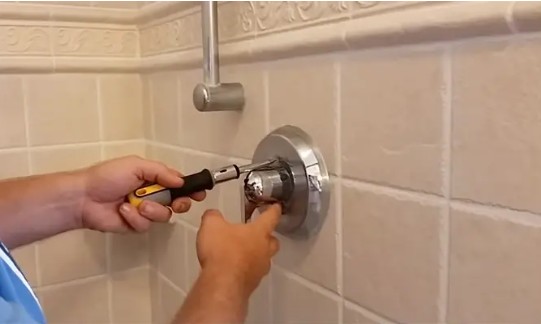
3. Use the Allen Wrench
Choose the correctly sized Allen wrench (hex key) that fits the set screws. Insert the Allen wrench into the screw head then loosen it by turning it counterclockwise. Ensure you’re applying enough pressure to engage the screw properly without stripping it.
4. Remove the Set Screws
Once the set screws are loosened, carefully unscrew them completely and keep them safely.
5. Remove the Handle
With the set screws removed, the handle should be free to pull off. Hold the handle firmly and gently wiggle it while pulling it out of the valve stem. If the handle feels stuck, you can try using a handle puller tool to assist in its removal.
6. Inspect and Clean
Take a moment to inspect and clean the valve stem and the inside of the handle for any debris or damage.
How To Remove A Threaded Shower Handle
A threaded shower handle is one that attaches to the shower valve stem using threads, which are helical ridges or grooves on the valve stem and inside the handle. These threads allow the handle to be screwed onto the valve stem, securing it in place.
This shower handle doesn’t have screws.
Tools and Materials
- Towel or cloth
- Adjustable wrench (optional)
- Handle puller tool (if needed)
Steps
a) Prepare the Area
Lay down a towel or cloth to catch any small parts or prevent them from falling down the drain.
b) Grip the Handle Firmly
Hold the handle securely with your hand. If it doesn’t easily turn, use an adjustable wrench to grasp the base of the handle, ensuring a secure grip without damaging the fixture.
c) Unscrew the Handle
Twist the handle counterclockwise with steady, even pressure to unscrew it from the valve stem. You may need to apply some force if the handle hasn’t been removed in a long time or if there’s residue or corrosion.
d) Use a Handle Puller (if necessary)
Consider using a handle puller tool if the handle is stuck and doesn’t unscrew easily. With this tool, you will be able to securely grip the handle and apply more force evenly to pull it off without damaging the fixture.
Apply a penetrating oil to the area if the handle is stuck due to corrosion or mineral deposits. Let it sit for some time to help loosen the handle before attempting to unscrew it again.
e) Inspect and Clean
After removing the handle, inspect the valve stem for any debris, corrosion, or damage. Clean the area thoroughly before installing a new handle.
Why Do I Need To Remove My Shower Handle?
Many reasons could compel you to remove your shower handle. These include:
i) To Replace It
Over time, your shower handle will wear out, get loose, cracked, or damaged due to constant use. In such a case, you may need to remove and replace it with a new one like the Moen 100710 Posi-Temp One-Handle Tub and Shower Replacement Knob Handle Kit (View on Amazon) that is stylish, polished, durable, and easy to install.
In addition, your current shower handle may be malfunctioning, leaking, or difficult to use. Also, perhaps you want to switch from a single-handle to a dual-handle system, or vice versa, for convenience or a change in usage preference.
Another reason to remove your current shower handle is to change to one that matches your preferred style. Swapping your existing handle with a different design can also help you improve usability and comfort.
You might also want to switch the material or finish of the handle to complement other fixtures in the shower or to better align with your overall design vision.
ii) Repair
If there’s a persistent leak from the handle area, you may need to remove the handle to repair or replace damaged internal components like the cartridge, O-rings, or seals. In addition, removing a sticking, hard-to-turn, or faulty handle allows for closer inspection, repairs, and maintenance.
iii) Cleaning or Maintenance
Regular cleaning and maintenance of a shower handle is necessary for smooth operation and preventing sticking or difficulty turning the handle. For you to successfully clean and maintain the shower handle and the internal components, you will need to take it out.
Why is cleaning and maintaining your shower handle necessary? The smooth functioning of your shower handle can be impacted by mineral deposits.
Moreover, mineral deposits can cause corrosion in regions with hard water. Also, moist environments like showers can foster mold and mildew growth, especially in hidden areas around the handle.
Regular cleaning not only maintains the functionality but also keeps your shower handle looking good and ensures a hygienic bathing environment.
iv) Access to Plumbing
Sometimes, blockages in the plumbing system can cause reduced water flow or other issues. Removing the handle can grant access to the pipes or valves for inspection and clearing any potential blockages.
You can also access the plumbing system via the handle area for adjustments or regular maintenance.
Furthermore, accessing the plumbing behind the handle allows you to diagnose and resolve water pressure problems, whether by adjusting valves or identifying obstructions.
Summary of How To Remove Shower Handle Without Screws
Initially, removing a shower handle without visible screws may seem daunting. However, you can accomplish it without much hassle with a systematic approach and the right set of tools. If you’re unsure or uncomfortable doing it yourself, do not hesitate to consult the manufacturer or a professional plumber to avoid any damage to your shower fixture.
Also, Read: