
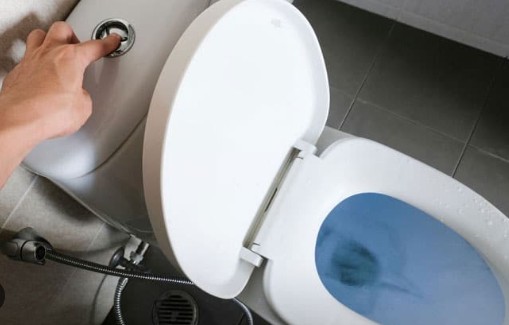
Push flush buttons are highly favored today for many reasons, including water conservation, user-friendliness, less space, and more hygienic. However, this component is not immune to issues, so what are the push button toilet flush problems?
Common issues with push flush buttons are a sticking button, flushing mechanism failure, water leakage, incomplete flush, and corrosion. Also, you may encounter loose or damaged connections and a broken or cracked button.
So, while reliable, your push flush button can stop working efficiently for one reason or another. In that case, how do you fix it? Read below.
Push Button Toilet Flush Problems (Causes & Fixes)
| Problem | Possible Causes | Recommended Fixes | |
| 1. | Stuck Button | Debris or sediment buildup Worn-out button or components Button misalignment Corrosion Lack of lubrication | Clean the button and its surroundings Check for misalignment Lubricate the button mechanism Fix leaks Replace the button |
| 2. | Flushing mechanism Failure | Damaged parts Clogs and blockages Inadequate water pressure Corrosion and rust Incorrect water level Improper installation | Replace damaged parts Remove debris Adjust the water pressure Lubricate moving parts Adjust water level Install the components correctly |
| 3. | Water Leakage | Faulty seal or gasket | Replace the seal or gasket |
| 4. | Incomplete Flush | Low water level | Adjust the float or fill valve |
| 5. | Corrosion | Metal parts coming into regular contact with water and cleaning chemicals | Use mild cleaners, keep your toilet clean, fix water leaks, and replace worn-out parts |
| 6. | Loose or Damaged Connections | Tighten or replace loose/ damaged connections | |
| 7. | Broken or Cracked Button | Physical damage Using excessive force while pressing Wear and tear over | Replace the button |
1. Stuck Button
You may encounter a situation where the button gets stuck in the pressed position or fails to return to its original position after being pushed. This problem can frustrate you because it can prevent the flush from operating correctly and lead to a running toilet or inadequate flushing.
The causes are dirt, grime, or mineral deposits accumulating around the flush button and its housing, impeding smooth movement. Over time, the button or its internal components can get damaged or worn, causing it to stick.
Also, button misalignment, corrosion of the flush button’s internal areas, or insufficient or dried-out lubrication in the button mechanism can cause friction and sticking.
Fix
- Use a mild cleaning solution and a soft cloth to clean the button and the area around it. Make sure to wash away debris or sediment causing the sticking.
- Ensure your flush button is correctly aligned with the flushing mechanism and sits flush with the housing.
- Apply a small amount of silicone or plumber’s grease to the moving parts of the flush button to reduce friction.
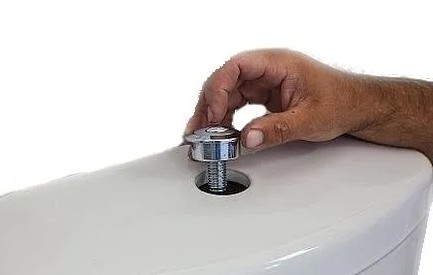
- Replace the button if damaged or worn out. This Dual Flush Valve Replacement Button (View on Amazon) is worth considering. It has a chrome finish, easy to install, and fits a 3-inch dual flush valve.
2. Flushing Mechanism Failure
Your toilet will not flush properly or may not flush at all if the flushing mechanism fails. The components within the flushing mechanism, such as the flapper (flush valve), fill valve, float, chain, or lever, can wear out over time due to regular use, mineral buildup, or exposure to cleaning chemicals.
Moreover, water will not flow smoothly if there’s a blockage in the water passages or a foreign object stuck in the flushing mechanism. Your flush button can also malfunction from rust, low or high water level in the tank, misalignment or improper installation, and insufficient water pressure.
Fix
- Remove clogs and debris.
- Clean the flapper, fill valve, float, chain, and lever, and remove mineral deposits.
- Adjust the level of water inside your toilet tank to the recommended level.
- Lubricate the moving parts in the flushing mechanism with silicone or plumber’s grease to reduce friction.
- Repair or replace worn-out parts.
- Ensure the water has adequate pressure. If not, fix the issue or hire a plumber.
3. Water Leakage
Your toilet can leak from different areas, but the seal or gasket may be faulty if yours leaks from the flush button area. This problem can lead to water wastage and potential water damage to the surrounding surfaces.
Fix
Replace the wax ring or gasket to create a proper seal.
4. Incomplete Flush
Typically, you should be able to clear waste with one flush, but that is hard to do when the tank has insufficient water, thus leading to an incomplete flush. You won’t get a proper flush with a low water level.
Your flush button may not release enough water to effectively flush the toilet or clear the waste, resulting in clogs or inadequate cleaning.
Fix
Adjust the float or fill valve to let more water flow into the tank after each flush.
5. Corrosion
Does your flush mechanism use metal components, such as metal chains, levers, or connectors? If so, they can be susceptible to corrosion over time, especially if they regularly come into contact with water or cleaning chemicals.
Fix
- Keep your toilet clean and dry to minimize exposure to moisture and cleaning chemicals that can accelerate corrosion.
- Use mild cleaners that are less harsh on the surfaces when cleaning metal parts.
- Regularly inspect metal components for signs of wear or corrosion and replace any parts that show significant damage. Use corrosion-resistant materials such as brass or stainless steel for replacement parts if available.
- If you have hard water, consider using water softeners or filtration systems to reduce the mineral content, which can contribute to corrosion.
6. Loose or Damaged Connections
The connections between the flush button and the flushing mechanism can become loose or damaged, affecting the toilet’s proper functioning.
Fix
Inspect the connections between the flush button and the flushing mechanism and tighten any loose connections but avoid over-tightening, as it could lead to damage. Also, replace any damaged parts.
7. Broken or Cracked Button
You can break or crack your button through physical damage, excessive force while pressing, or wear and tear over time. If your flush button cracks or breaks, it can lead to difficulties in flushing the toilet or may prevent it from working altogether.
Fix
Carefully examine the broken or cracked button to assess the extent of the damage. Determine if the button is entirely broken, just cracked, or if it’s still partially functional.
Use a temporary fix if the button is partially functional and you need to flush the toilet. For example, try using your fingers to carefully press the inner part of the button, which may still engage the flush mechanism.
However, replacing the broken or cracked button is the best and most permanent solution. Check with the toilet’s manufacturer or a plumbing supply store for a compatible replacement button. This Dual Flush Valve Replacement Button (View on Amazon) is worth considering. It has a chrome finish, easy to install, and fits a 3-inch dual flush valve.
Keep in mind that the button may come as a separate part or as part of a flush handle assembly, but this depends on the toilet model.
How Do You Fix A Push Button Toilet That Won’t Flush?
Adjusting a push button toilet flush typically involves modifying the water level in the toilet tank, which can affect the flush volume and the strength of the flush. The exact method of adjustment may vary depending on the specific type of toilet flush system you have.
Here’s a general guide on how to adjust a push-button toilet flush:
a) Remove the Toilet Tank Lid
Lift the toilet tank lid and carefully set it aside on a flat surface. Be cautious, as the tank lid can be heavy and fragile.
b) Locate the Water Level Adjustment Screw or Float Arm
Inside the toilet tank, you’ll find either a water level adjustment screw or a float arm connected to the fill valve.
- Water Level Adjustment Screw: If your toilet has a water level adjustment screw, it will be located on top of the fill valve. It may have a screwdriver slot or a knob you can turn counterclockwise or clockwise.
- Float Arm: If your toilet has a float arm, it will be a rod with a float ball attached to it. The float ball floats on the water’s surface and rises or falls based on the water level in the tank.
c) Adjust the Water Level
Turn the adjustment screw clockwise (if present) or bend the float arm slightly downwards to increase the water level. On the other hand, turning the adjustment screw counterclockwise or bending the float arm slightly upwards decreases the water level.
The goal is to set the water level to the designated fill line marked on the inside of the tank or to the water level recommended by the toilet manufacturer.
d) Test the Flush
After adjusting the water level, flush the toilet and observe the flush performance. The flush should be strong and effective without overflowing the tank.
e) Fine-Tuning
If necessary, make minor adjustments to achieve the desired flush performance. Test the flush after each adjustment until you are satisfied with the results.
f) Replace the Tank Lid
Once you are done adjusting the water level, carefully place the toilet tank lid back onto the tank.

Types Of Push Button Toilet Flush
Here are the different types of push-flush buttons
i) Single Flush Push Button
This is the most basic type of push-button toilet flush and consists of a single button pressed to activate a single, full flush.
ii) Dual Flush Push Button
A dual flush push button has two buttons- one for a partial and another for a full flush. Dual flush systems offer water-saving benefits by allowing users to choose the appropriate flush volume based on the type of waste.
iii) Eco Flush Push Button
An eco-flush push button is similar to the dual flush system but may have slightly different labels or symbols.
iv) Sensor-Activated Push Button
Some modern toilets are equipped with sensor-activated push buttons. Instead of physically pressing the button, a user can simply wave a hand over or near the sensor, and the toilet will automatically activate the flush.
v) Pneumatic (Air Pressure) Push Button
In this type of system, the push button operates using air pressure. When the button is pressed, it creates air pressure that triggers the flush mechanism.
vi) Electronic Push Button
Electronic push-button flush systems are more advanced and may have various features, such as touch-sensitive buttons or customizable flush options.
Final Take On Push Button Toilet Flush Problems
You can troubleshoot and fix problems with your push flush button through a DIY project. However, consider calling a professional for issues beyond your skill level.
Here are other interesting posts: