
When your shower valve undergoes irreparable wear or damage, buying and installing a quality and compatible replacement is the only solution.
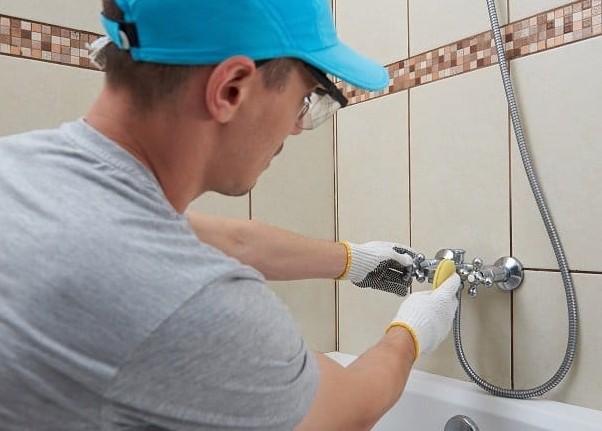
Installing a shower valve can be tedious and complex work since it entails working on your bathroom wall; luckily, you can replace shower valve without removing wall.
Replacing a shower valve without removing the wall depends on the ease of access, plumbing layout, valve type, experience level, and availability of tools. This task is easier if the plumbing pipes are in easily accessible areas like the basement or crawl space.
This kind of repair work must be done by an individual with the necessary skill and experience to avoid causing more damage.
How Do You Replace A Shower Valve Without Cutting The Wall? (Step-By-Step Guide!)
Follow these steps to correctly replace your faulty shower valve without cutting your bathroom wall.
Tools
- A replacement shower valve
- Screwdrivers
- Needle nose pliers
- Allen wrench
- Utility knife
- Hex socket
- Pliers
1. Cover The Shower Drain
Cover your shower drain using a cloth to keep debris and screws from falling into the drain and getting lost or causing blockages.
2. Cut Off The Water Supply
Before replacing the valve, stop the water flow by turning the valve that controls the water flow to your shower (shut-off valve) clockwise. Alternatively, cut off your home’s primary water source.
Temporarily stopping water flow before commencing the replacement is necessary to prevent flooding or damaging the surrounding areas. Failure to turn off the water means it will keep flowing and potentially cause significant water damage to the area around the shower, including the walls, floor, and ceiling.
Additionally, if you try to replace the shower valve while the water is still flowing, you could be at risk of being scalded by hot water. Therefore, protect your skin and safely replace your shower valve by stopping water flow.
2. Remove The Handle And The Trim Plate
You must take out the handle and trim plate to access the shower valve. First, take out the screw (typically located under a small cap on the handle or the handle’s side), keeping the shower handle in place using a screwdriver.
The handle will slide off easily after removing the screw. However, if it is stuck, use pliers to wiggle it loose gently.
Once you successfully remove the handle, take out the trim plate by unscrewing the screws holding it, then gently pulling it out. However, if it’s stuck, pry it out with a putty knife.
This will expose the shower valve and about 12 inches (30 cm) opening to allow you to remove the old shower valve and install the new one.
Soak the trim plate and shower handle in white vinegar or lime remover to remove debris like limescale and soap scum. Leave them soaking while you replace the shower valve.

3. Remove The Retaining Clip
Locate the retaining clip holding the valve, then remove it using a wrench or needle nose pliers.
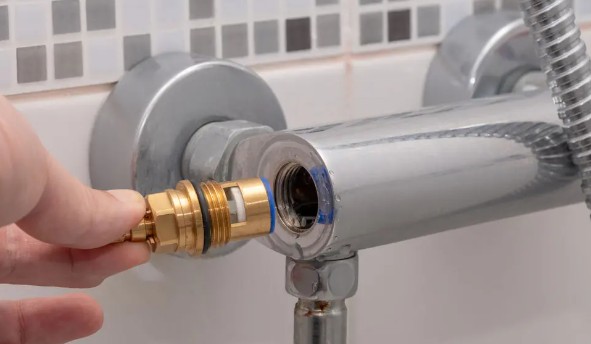
4. Pull Out The Old Shower Valve
Once the retaining clip is out, you can remove the current shower valve. Do so by directing a hex socket into the shower valve, then turn it counterclockwise to remove the shower valve from its housing.
Make sure you use the right size hex socket because this tool comes in different sizes. Alternatively, take it out using pliers.
If you don’t have a hex socket, buy it from a hardware, home improvement store, or even online. Consider the LEXIVON Master HEX Bit Socket Set (View on Amazon) because it is durable, corrosion and rust-resistant, and comfortable.
5. Replace The New Shower Valve
Insert the new valve in the same position as the old one using pliers and ensure it’s aligned correctly. After that, turn it clockwise, then secure it further using the retaining clip; use needle nose pliers to do so.
6. Put The Trim Plate And Handle Back
Reattach the trim plate and handle you removed earlier to the valve, securing them with their screws but be careful not to overtighten them.
7. Test The New Shower Valve
Turn the shut-off valve back on, then test your new valve to ensure it’s working correctly. Check for leaks and adjust the shower handle as needed.
How To Replace Shower Valve Without Removing Tile
If you can get to your shower valve from the opposite side of the wall the valve is mounted, then you can replace the valve without taking out the bathroom tile. This is convenient because this wall is typically untilled, thus saving you from having to remove your bathroom tile.
Opening this wall is much easier than taking out the tile to install a replacement shower valve. So, before deciding to remove the tile, check whether this approach is doable in your home.
If lucky, the wall behind your shower faucet may have a detachable panel. However, if this method isn’t feasible, you may have to take out the bathroom tile to access the shower valve.
What To Consider When Replacing A Shower Valve Without Removing The Wall
Some circumstances determine whether you can install a replacement shower valve without hacking your bathroom wall. These are:
a) The Access Panel
You can remove the old shower valve and install the new one without cutting into the wall if there’s an access panel on the opposite side of the wall from the valve. However, this option isn’t always available since not all showers have access panels.
b) The Shower Valve Type
The valve type in your shower can also make valve replacement without hacking the wall easier or more difficult. For instance, it is easier to replace a standard compression valve than a thermostatic valve or a pressure-balancing valve since it may require more extensive plumbing work.
c) Plumbing Layout
Your bathroom plumbing pipes’ location may also play a role in whether you can replace the valve without cutting the wall. It may be easier to do the work if the pipes are located in accessible areas, such as a basement or crawl space.
d) Tools and Experience
Replacing a shower valve can be complex, especially if you are not equipped for the job. You will require the necessary tools to perform the replacement correctly, like the right screwdriver and pliers.
Also, you are better off letting a professional plumber do it if you have never done this before because the task requires skills and experience.
Final Remarks on Replace Shower Valve Without Removing Wall
Your shower valves will need replacing at some point as they inevitably wear out from extended use.
Replacing your shower valve without taking out the wall, whether tiled or drywall, makes the work easier and cleaner. So, check whether you take this approach before cutting your bathroom wall.
Also, read: