
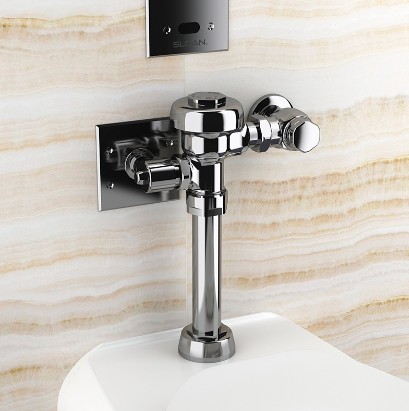
In the world of automated restroom technology, Sloan automatic flush valves have become a symbol of convenience and water efficiency. However, even the most advanced systems can encounter hiccups, ergo the importance of a Sloan Automatic Flush Valve Troubleshooting Guide.
Common Sloan Automatic Flush Valve problems are no flush, continuous flushing, water leakage around the valve, and flushing at inappropriate times. You may also encounter a unit that doesn’t reset after flushing, an unusual noise during a flush, an incomplete flush, and inconsistent flush timing.
Let’s unravel the cause and the appropriate solutions for Sloan automatic flush issues in the sections below. However, before delving deeper, below is a summary table of the problems and their causes and fixes.
Sloan Automatic Flush Valve Troubleshooting (Problems & Fixes)
| Problem | Possible Causes | Recommended Fixes | |
| 1. | No Flush | Low battery power Obstructed sensor Water supply issues | Replace the batteries Clean and properly align the sensors Facilitate adequate water supply |
| 2. | Continuous Flushing | Stuck solenoid valve Sensor malfunction Dirty or damaged diaphragm High water pressure | Clean or replace the solenoid valve Get a new sensor Clean or replace the diaphragm Install a pressure regulator |
| 3. | Water Leakage Around The Valve | Loose connections Worn-out gaskets and seals Damaged diaphragm Improper installation Deteriorated valve body | Tighten loose connections Replace damaged gaskets and seals Install a replacement diaphragm Fix an improper installation Get a new valve body |
| 4. | Flushing At Inappropriate Times | Sensor sensitivity and calibration issues Sensor interference Software or firmware problem | Fine-tune the sensor sensitivity and range settings Adjust sensor angle Remove interferences Get software or firmware updates |
| 5. | Unit Not Resetting After Flush | Depleted batteries Malfunctioning reset mechanism Blocked flush valve Faulty sensor A malfunctioning solenoid | Replace the batteries Reset or repair the reset mechanism Clean the flush valve Clean and adjust the sensor’s range Replace the solenoid |
| 6. | Unusual Noises During Flush | Damaged inside cover Faulty diaphragm assembly or relief valve Sediments in the valve Loose nuts, connections, and bolts | Install a replacement inside cover Replace the diaphragm assembly or relief valve Clean the flush valve Tighten loose nuts, connections, and bolts |
| 7. | Short Flush | Worn-out diaphragm assembly Clogged flush valve Malfunctioning reset mechanism | Replace the diaphragm assembly Clean the flush valve Repair or replace the reset mechanism |
| 8. | Incomplete Flush | Partially blocked flush valve Low water level Worn-out flush valve components | Clean the Sloan automatic flush valve Raise and maintain the water pressure at the appropriate level Replace the worn out parts |
1. No Flush
If your Sloan automated flush system is in good condition, you should hear the familiar whoosh of water signaling a clean and efficient flush once the sensor is activated. However, you have an issue you must fix if your flush valve doesn’t flush.
Possible causes for this problem are low battery power, sensor obstruction, a faulty sensor, and water supply issues.
Fix
Inspect the sensor for any obstructions, such as dirt or tissue paper, which might hinder its ability to detect motion. Clean the sensor to remove debris.
Sloan flush valves need fresh energy to operate efficiently. Therefore, consider replacing the batteries if the flush seems hesitant or non-existent.
Ensure the sensor is properly aligned to detect the user’s movements accurately. In addition, check and remove any blockages in the water supply line and the valve.
2. Continuous Flushing
Picture this scenario. Instead of a quick and efficient flush, your Sloan automatic flush system delivers a never-ending gush of water. Continuous flushing isn’t a problem you want to encounter since it is wasteful and annoying.
Fortunately, you can fix it. You can trace the cause of this problem to a stuck solenoid valve, sensor malfunction, a compromised diaphragm, and high water pressure.
Fix
- Examine the solenoid valve for debris or mineral buildup and clean it accordingly. If the problem persists, the valve is likely damaged. In that case, replace it.
- Align the sensor correctly to achieve a well-timed flush.
- Inspect the sensor for wear or damage because a malfunctioning sensor can trigger continuous flushing. Replace a damaged sensor.
- High water pressure can also cause an unending cascade. Therefore, make sure the water pressure falls under the recommended range (40-60 psi, with over 80 psi considered too high) for a controlled and timely flush. Consider installing a water pressure regulator.
- Clean the diaphragm to remove the debris blocking it. Moreover, inspect and replace the diaphragm if compromised.
3. Water Leakage Around The Valve
To get to the root of water leakage around a Sloan automatic flush valve, inspect the seals for wear and check all the connections around the flush valve, including nuts, bolts, and gaskets. In addition, inspect the gaskets for deterioration, the diaphragm for tears or damage, and the valve body for cracks, corrosion, or visible damage.
Fix
- Tighten any loose components to create a watertight seal.
- Install fresh gaskets to rejuvenate the seal.
- Replace any damaged or worn-out seals to form a secure connection.
- Buy and install a replacement diaphragm.
- Also, replace the valve body if damaged.
- Review the installation manual to ensure the Sloan automatic flush valve is installed correctly. In addition, maintain optimal water pressure to prolong the life of the flush valve.
- Moreover, incorporate regular maintenance that involves periodically checking and tightening connections, inspecting gaskets, and ensuring all components are in top condition to prevent future leaks.
4. Flushing At Inappropriate Times
This problem feels like your flushing system has a mind of its own. If you encounter it, you are likely dealing with sensor sensitivity and calibration issues, sensor interference, or a software or firmware problem.
Fix
- Follow the manufacturer’s guidelines to fine-tune the sensor sensitivity and range settings to eliminate untimely flushes and ensure accurate detection.
- External factors can influence the flush’s timing. So, check for nearby electronic devices or strong light sources that might interfere with the sensor. If necessary, adjust the sensor angle. Also, create a sensor-friendly environment in the restroom to ensure precise detection.
- Check and install any updates available for your Sloan automatic flush valve.
5. The Flush Valve Not Resetting After Flush
Once a Sloan automatic flush valve completes a flush cycle, the valve closes to stop the water flow. Suppose the flush valve fails to reset after a flush. In that case, it can lead to continuous flushing or render the valve non-operational, so troubleshooting and fixing it is important.
First, check the batteries because insufficient power can prevent the flush valve from resetting properly. Also, inspect the reset mechanism for any signs of damage or malfunction and the flush valve for any debris or blockages.
Other causes are a faulty sensor and a malfunctioning solenoid.
Fix
- Replace the batteries if needed.
- Repair or reset the reset mechanism.
- Clean the valve thoroughly to remove debris and blockages to ensure a clear path for the reset action. Additionally, replace any damaged parts of the valve.
- Use a damp, clean, soft cloth to Clean the unit’s sensor to ensure no dirt or debris affects its performance. In addition, adjust its range.
- Replace a faulty solenoid.
6. Unusual Noises During Flush
Production of unusual noises as your Sloan automatic flush valve flushes is indicative of a damaged inside cover, a damaged diaphragm assembly or relief valve, or sediments in the valve.
Loose nuts, bolts, or connections also contribute to rattling or vibrating sounds during the flush.
Fix
- Install a replacement inside cover
- Replace the diaphragm assembly or relief valve
- Thoroughly clean the flush valve.
- Tighten all connections around the flush valve to secure them and eliminate any potential noise sources.
7. Short Flush
A short flush is not only annoying but also less effective in removing waste (it will likely leave some leftover waste in the bowl). So, this is undoubtedly an issue if your Sloan automatic flush valve develops it, but what causes it?
You can trace the root of this problem to a worn-out diaphragm assembly, a clogged flush valve, and a malfunctioning reset mechanism.
Fix
- Replace the diaphragm assembly.
- Clean the flush valve thoroughly to remove blockages and allow for a full and effective flush.
- Inspect the reset mechanism for any issues and repair or replace it.
8. Incomplete Flush
A partially blocked flush valve can impede the water flow, resulting in an incomplete flush. Furthermore, inadequate water pressure can inhibit a Sloan automatic flush valve flushing problem.
Additionally, worn-out flush valve components can hinder flushing, potentially causing an incomplete flush.
Fix
- Inspect and clean the flush valve to get rid of debris.
- Keep the water pressure at the proper levels.
- Inspect your Sloan automatic flush valve components like the diaphragm and replace any that show signs of wear to restore optimal flushing.
Why Is My Sloan Automatic Flush Valve Blinking Red?
A red blinking light on a Sloan automatic flush valve typically indicates a low battery or a sensor issue. So, replace the batteries with fresh ones and see if that resolves the problem.
Also, clean the sensor and remove any obstructions to ensure the sensor can efficiently detect a user’s presence and trigger the flushing mechanism.
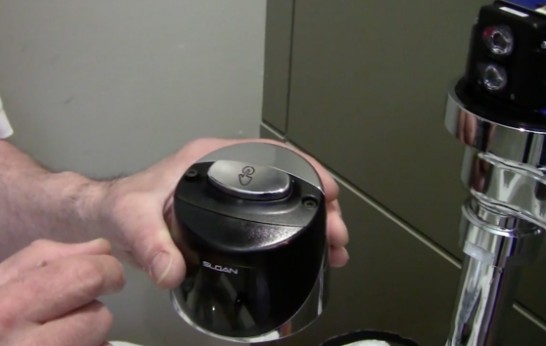
How To Change Batteries on A Sloan G2 Flushometer
The battery compartment on the Sloan G2 Flushometer is located on top of the valve cover. Here’s how to access and change the batteries.
- Loosen the two screws on top of the unit, then take out the cover.
- Unplug the wire clip from the battery compartment. After that, loosen the retaining screw to remove the cover.
- Remove the dead batteries and replace them with new ones.
- Replace the battery compartment cover and tighten the retaining screw, making sure the battery compartment sits properly against the gasket to get a good seal.
- Place the sensor module back to the plate and plug the connector back into the battery compartment cover.
- Replace the button assembly and cover, then tighten the screws on top of the unit.
Note
The Sloan G2 flushometer will warn you that the batteries are depleted by flushing a red light four times when you approach the urinal.
Final Remarks On Sloan Automatic Flush Valve Troubleshooting
A well-maintained automatic flush valve not only ensures water conservation but also contributes to a more hygienic restroom environment. Therefore, regularly clean and maintain your Sloan automatic flush valve and promptly resolve any issues to ensure continued efficient performance and maximize your flush valve’s lifespan.
Here Are Other Interesting Topics: